| Workspace |
|
EasyBilling stores documents, reports and settings of your company in a single location, called workspace. User can create different workspaces for different companies. To manage your workspace, simply click menu “File > Switch Workspace”.
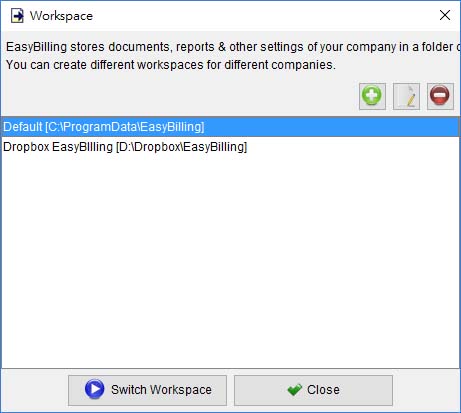
To switch to other workspace, simply highlight the workspace and click [Switch Workspace] button.
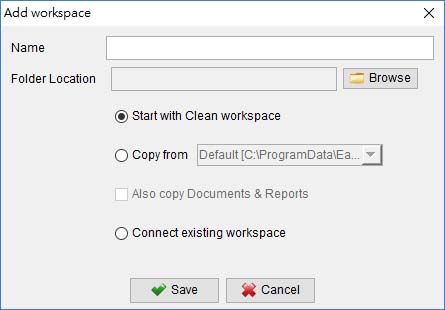
The first workspace in Easybilling is named as Default. You can click [+] button to add workspace. User can specify the workspace storage location and put it in local computer, shared folder or network location (e.g. NAS).
EasyBilling Network Mode
EasyBilling is a standalone application, and does not have network/multi-user access features. However, you can set the Data Folder (workspace) to a network drive/shared folder, so that EasyBilling from different computers can access the same "data".
In EasyBilling, you can set your workspace in menu "File > Switch Workspace". Click [+] button to create a new workspace, and choose the workspace folder (from your network drive/shared folder) by clicking the [Browse] button.
In EasyBilling of other computers, you need to setup the workspace too. In menu "File > Switch Workspace" and click [+] button to create a new workspace. But you need to choose "Connect existing workspace" first and then click the [Browse] button to choose the same workspace folder as before.
After that, different EasyBilling are pointed to the same workspace folder (that is located in network drive/shared folder).
There is one limitation of this approach, different EasyBilling cannot access at the same time. As the database is locked when EasyBilling is running, EasyBilling in other computers can only connect the same workspace in READ-ONLY mode.
|
