
How to Measure and Configure Cheque Layout Fields in ChequeSystem
Are you setting up a new cheque layout but aren’t sure how to measure and configure the field positions? In ChequeSystem, editing your layout and adjusting where the text prints is a straightforward process.
Understanding Cheque Fields
To ensure your text prints in the correct location, you need to define four key measurements for each field on the cheque. This applies to all standard fields, including: A/C Payee Only, Date, Place of Issue, Payee, Bearer, Text Line 1, Text Line 2, Amount.
How to Configure Your Layout
- Open the Cheque Layout window in ChequeSystem. (in the menu “Management > Cheque Layout List”)
- Select the radio button next to the specific field you want to adjust.
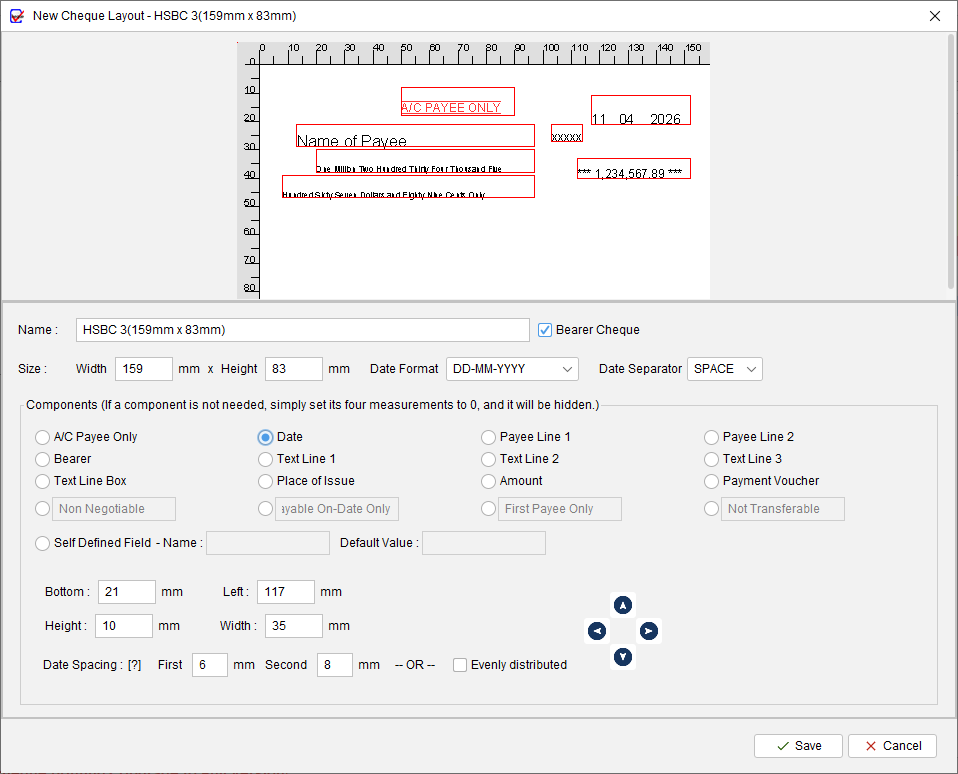
- Enter your desired values for the Left, Bottom, Height, and Width measurements.
Measurement Guide
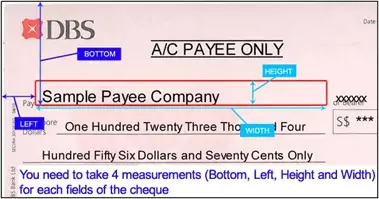
These four dimensions determine the exact size and position of your text. You can refer to the image below for a visual guide on how to measure your physical cheque:
- Left: The distance from the left edge of the cheque to the starting (left) edge of the text field.
- Bottom: The distance from the top edge of the cheque to the lowest (bottom) edge of the text field.
- Height: The total vertical space available for the text.
- Width: The total horizontal space available for the text.
Tip: After entering your measurements, we recommend printing a test copy on a blank piece of paper. You can then hold the paper over your actual cheque up to a light source to verify that all fields align perfectly!