Create Cheque
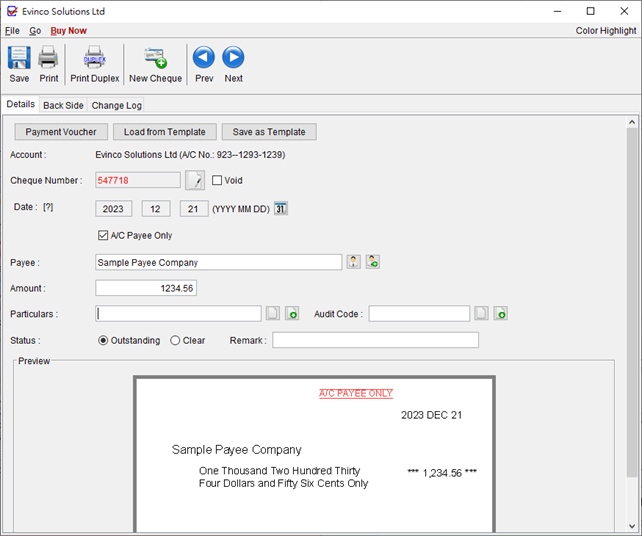
Clicking “New Cheque” or “Edit” will open the chequebook as shown below.

Within the Tool Bar, you can save and print the cheque. Additionally, you can switch to a new cheque or use the “Arrow” button to navigate to the previous or next cheque.
The following details can be filled in for the cheque:
- Account: Displays the current account information, including the account name and number.
- Cheque Number: Automatically generated based on the defined sequence in the ChequeBook.
- Void: Mark the cheque as void by checking the box. VOID cheques will not be counted in report calculations.
- Date: Specify the date of the cheque by clicking the “Calendar” icon.
- A/C Payee Only: Mark the cheque as “Crossed” with “A/C PAYEE ONLY” text.
- Bearer: Check the box if the cheque should be a “Bearer Cheque.”
- Payee: Enter the payee’s name manually or select from the Payee List by clicking the icon.
- Amount: Enter the cheque amount. The amount in words will be automatically generated.
- Particulars: Field to add notes about the cheque.
- Audit Code: Field to add audit code for accounting purpose.
- Status: The status of a cheque can be set as Outstanding or Clear.
- Remarks: Another field to include additional notes about the cheque.
Cheque can be highlighted with different colors by clicking the color menu on the top-right corner.
As you fill in the cheque details, the preview pane will simultaneously display the corresponding cheque image.
Print Cheque
Once you have entered all the necessary information, simply click the “Print” button at the top to print your cheque.