How to prepare a receipt?
- In the main screen, select the folder that the new receipt belongs to.
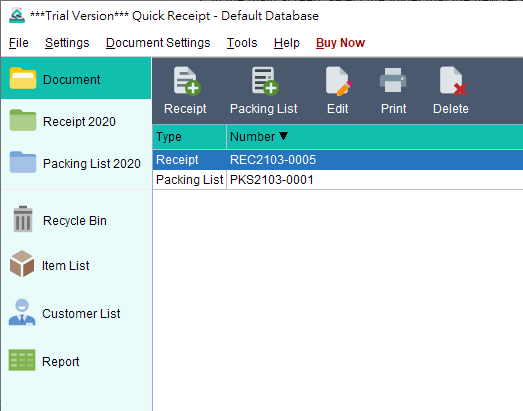
- Click the [Receipt] icon at the top.
- The receipt window will be shown.
- The receipt window is composed by three main tabs: Document Details, Private and Printed Records.

- You can prepare receipt under “Document Details” tab. Document number will be generated automatically according to the settings. Customer information can be input manually or loaded from Customer List.
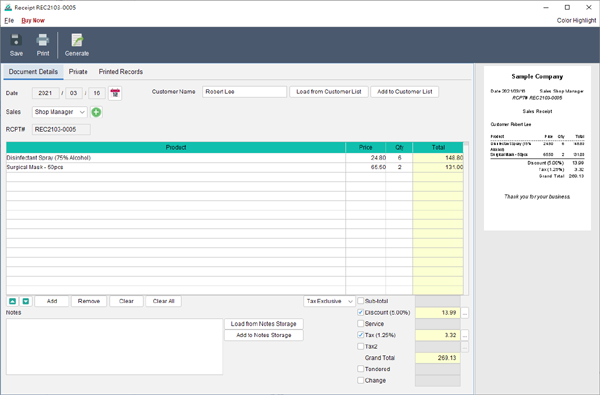
- Line Item can be input manually or loaded from Item List by clicking [Load from Item List] button. Discount, Tax information can be set under sub-total section. Sub-total and Total amount will be calculated automatically.
- When document is ready, click [Save] icon to save document, and click [Print] to print it.
- Receipt can be used to convert into Packing List. Click [Generate] icon at the top will open Packing List windows and load the current receipt into Packing List.
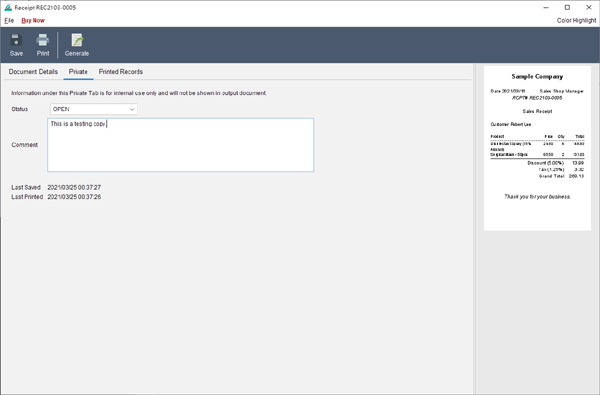
- In Private tab, you can set document status and add save comment here. These information will not be shown in the receipt.
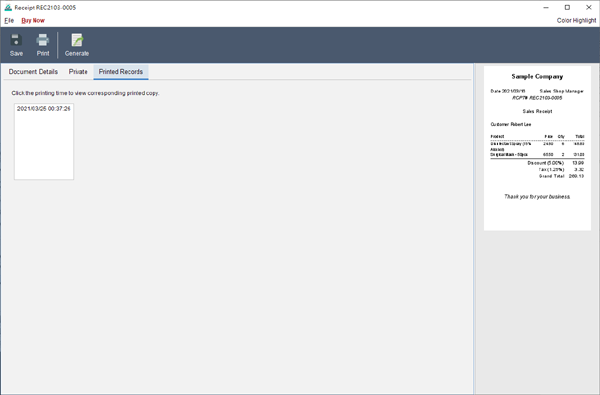
- Once document is printed, a copy will be saved and will be listed under Printed Records tab.


Prefer to Watch? See the Full Tutorial Below
This video covers all the details mentioned in the article, giving you a complete visual walkthrough from start to finish.
Video Tutorial: Create Receipts